Families and Children
Child accounts let children have their own sign-in while parents keep control of setup and key account settings.
What is a child account?
A child account is a separate login for a child, linked to one or more parent accounts.
With a child account, children can:
- Have their own name, avatar, and login.
- See shared group content (for example chores and events).
- Use their own notification settings.
- Use the app without a personal subscription.
Child accounts are always free and access content through group access only. Parents stay in control of account setup and key settings.
Children cannot create events or chores of their own. Children can view group content and mark shared items as completed.
Before you start
Before creating a child account, make sure you have:
- Ensure you have a parent account.
- Ensure at least one group exists where the parent is already a member.
Create a child account
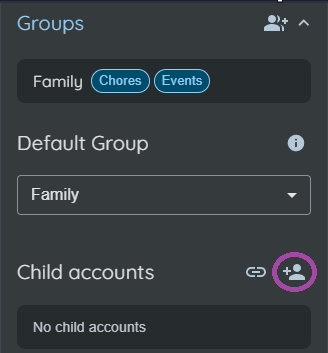
- Open Settings.
- Go to Groups -> Child accounts.
- Select Create child account.
- Fill in:
- Enter the child's name.
- Select the child's primary group.
- Create a password.
- Provide a sign-in name (use the suggested one or request another).
- Remember and store this password securely; parents must reset child passwords via child account management.
- Save.
After saving, the child can sign in with the child sign-in name and password.
Sign in as a child
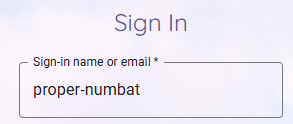
- Open the sign-in page.
- Enter the child sign-in name in the login field.
- Enter the child password.
- Select Sign in.
Manage a child account as a parent
In Settings, open the child account and select Manage child account.
You can:
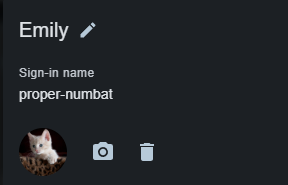
- Update the child name.
- Change the child password.
- Update the avatar.
- View the child sign-in name.
- Manage parent links (invite another parent when needed).
Convert a child account to a regular account
When a child is ready for a regular account:
- Open Settings and select Manage child account.
- Choose Convert to regular.
- Enter the child's email address.
- Confirm.
The app sends an email verification message to complete the process.
Convert an existing account to a child account
Use this when your child already has a regular Busy Days account and you want to link it as a child account.
- Open Settings.
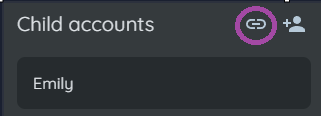
- Go to Child accounts and click Link an existing account as a child.
- Select the group that should be the default group for the child.
- Send the invitation to the existing account.
- Ask the invited user to open the invitation and accept it.
After acceptance, the account is converted to a child account and linked to the parent.
If needed, manage parent links and child settings later from Manage child account.
What child accounts cannot do
Some account-level settings are parent-managed for child accounts, for example:
- Child account creation and advanced account management.
- Personal subscription management.
- Some feature settings controlled by account type or group access.
This keeps setup predictable and family-safe.
Quick troubleshooting
- Child cannot sign in: Check sign-in name spelling and reset the password from parent management.
- Child cannot access group content: Confirm the child is added to the intended group and at least one linked parent is an active member of that same group.
- Need another guardian: In Settings, open the child account and select Manage child account. In the co-parent section, choose Add a parent, enter the guardian's Busy Days account email, and send the invitation. Ask the guardian to accept the invitation in the app. If it stays pending, cancel the pending invite and send a new one.