Groups
Collaborate with your family, roommates, or friends by creating groups in Busy Days. Groups allow you to share events and chores with other people.
Group owners and administrators must have the selected module (e.g., Chores or Events) included in their own plan. Other group members can join with limited access by registering, even if they don’t have a personal subscription.
Creating a Group
Create Your First Group
- Go to Settings → Groups
- Click Create New Group
- Enter a name, an optional description, and select which modules to use
- Click Create
You’ll automatically be assigned as the Owner of the group.
Group Modules
When creating a group, choose which features you want to share with your group. You can only select modules that you personally have access to.
Adding Members
Add an Existing User
- Open your group
- Click Add Member
- Enter their email address
- Send the invitation
- They’ll receive an email invitation to register and join your group. If they already have an account, they can accept the invitation directly in the app.
Add a Non-Registered Member
You can also add members who don’t use the app themselves (for example, small children). These members can be assigned to chores or events, but they can’t mark items as completed.
- Click Add Member
- Enter their name
- Leave the email field empty
Member Roles and Permissions
| Function | User | Owner | Admin | Member | |
|---|---|---|---|---|---|
| Items | Add | ✓ | ✓ | ✓ | |
| Delete | ✓ | ✓ | ✓ | ||
| Update | ✓ | ✓ | ✓ | ||
| Mark as done | ✓ | ✓ | ✓ | ✓ | |
| Groups | Add | ✓ | |||
| Delete | ✓ | ||||
| Members | Add | ✓ | |||
| Remove | ✓ | ||||
| Update others | ✓ | ||||
| Update own info | ✓ | ✓ | ✓ |
Example:
- If a user has a Busy Days Basic subscription that includes the Chores module, they can be an Owner or Admin in groups where chores are shared. If that same user joins a group that shares events, they can be a Member, meaning they can view events and mark tasks as completed.
- If a user has a Busy Days Plus or Premium subscription that includes all modules, they can act as an Owner or Admin in any group.
Managing Members
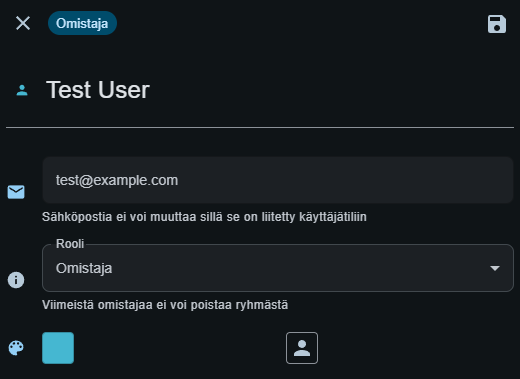
Change a Member’s Role
- Go to the group settings
- Find the member
- Click their current role
- Select a new role (Owner, Admin, or Member)
- Save changes
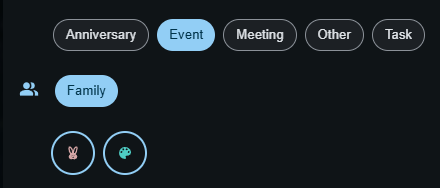
Customize Member Avatar
Give each member a unique avatar:
- Color: Choose from the color palette
- Icon: Pick an icon to represent the member
Remove Members
- Open group settings
- Find the member
- Click Remove
- Confirm
Removed members:
- Lose access to all group content
- Can be re-invited later if needed
Sharing Chores and Events with a Group
Add a Group to a Chore or Event
- You can link a chore or event to one group.
- Once a group is selected, you can then assign one or more group members.
- All members of the group can see the shared chores and events.
Managing Multiple Groups
You can belong to multiple groups:
- View all your groups under Settings → Groups
- Choose which group to assign to a chore or event
- Each group has its own members and settings
Leaving a Group
As a Member
- Go to Settings → Groups
- Find the group
- Click Leave Group
- Confirm
You’ll lose access to all content shared within the group.
As an Owner
If you’re the only owner of the group:
- Transfer ownership to another admin or member before leaving
- Or Delete the group entirely (the group will be removed for all members)
Deleting a Group
Only owners can delete groups.
- Go to the group settings
- Click Delete Group
- Confirm deletion
⚠️ Warning: This will permanently delete:
- The group for all members
- All shared chores and events
- This action cannot be undone
Common Use Cases
Family
- Add all family members (including children as non-registered members)
- Share household chores among family members
- Coordinate family events and tasks
- Stay on top of what’s happening at home
Roommates
- Share common chores with your housemates
- Manage private chores and events that aren’t shared with the group
Couples
- Divide chores fairly
- Create shared events
- Plan and coordinate schedules together